African violets bloom when food and light is adequate and their roots are slightly pot-bound. After your violet has finished a vigorous blooming cycle, it is best to repot it using fresh potting mix. Use the same size pot it was previously growing in or one only marginally larger. Try to avoid using a pot which is too large or more than 1/3 the diameter of your plant's outer leaves after you finish grooming off old leaves. Remove any lower leaves that have become pale, weak or broken. Try to snap them off clean at the base, so there are very few, if any nubs left on the plant's main stem. Also lightly trim up the plant's roots with a sharp knife. Place the plant into the new pot and fill with fresh soil so that the base of the growing center is level or slightly above the soil and level with the rim of the pot. Water the plant with room temperature water until it begins to run out the bottom drainage holes. When the plant needs its next watering, begin using a diluted fertilizer, and fertilize about 2-3 times per month. Give the plant strong, indirect lighting and give it a quarter turn whenever it begins to lean toward the light source. With good, consistent care and adequate light and fertilizing, your plant should enter another blooming cycle in about two months or so. If it doesn’t, investigate which of the three necessary components are lacking: light, fertilizer or constriction of roots. As is very often the case, your plant may need stronger light or more consistent watering, as each wilting will delay the next blooming cycle and reduce the vigor of the plant.
|
As we head into the new year, I thought I’d share with you some of my favorite tools, among a few other things I heavily rely on to tend my violets. 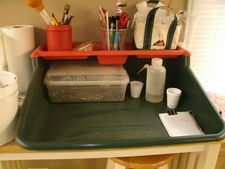 First, the photo on the left is my potting and workstation. The tray itself is my most important tool, and it came from Lee Valley Tools. It keeps my mess contained, cleans up in a jiffy, is super sturdy and fairly easily portable. The red tray in the top lifts off and has useful cubbies for the rest of my stuff.  Also at my station is a small plastic shoebox I use for small amounts of potting mix. The sides snap closed, and it does a great job of keeping the moisture contained. 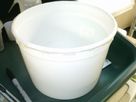 Here’s a silly “tool” I couldn’t live without – it’s just a plain old plastic bucket that originally held my parrot’s food. It’s small enough to fit on the tabletop, easily portable for all those grooming sessions, and easily cleaned. I keep them all, since they can be used for just about anything. I also use them to store fertilizers, chemicals, seeds or whatever else. They also come with lids and make perfect transporting containers for a few minis. They’re super handy! So find yourself a nice little bucket, too. 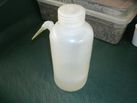 I couldn’t live without this perfect little watering bottle that came from a science supply store. It’s just absolutely great for watering between leaves. 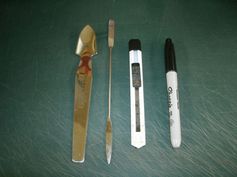 These are my basic, use-them-all-the-time tools. From left to right: A miniature soil scoop from Lee Valley Tools; the very best sucker-plucker in the world; a simple and inexpensive snap knife (about a dollar) that is used for scraping necks, reducing root balls and trimming leaves to put down; and finally, no violet room should be without a Sharpie for labeling pots and baggies. 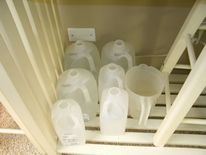 I recycle, too. I keep both ½ and one-gallon milk jugs to store my water. The ½ gallon size makes it easier to water the trays in the back without killing my wrist or hitting the light fixture. I store them on the bottom of my workstation. I always designate one jug for plain water only.
|
Archives
April 2018
|
 RSS Feed